
Before you begin
Before mounting your Clutch Cam, make sure you have:
- 1A ladder that reaches the top of the fenceAll Clutch Cams are mounted near the top of the back glass, on the center of the baseline fence.
- 2Heavy-duty zip tiesThe base is magnetic, but heavy-duty zip ties are needed to secure the camera firmly to the fence.
- 3Power and internet ready at the mounting spotWe recommend PoE when possible. See the power & internet requirements.
Connect power and internet before mounting
Before mounting the camera, connect it to power and internet so you can confirm it is working from the Clutch dashboard.
Before climbing the ladder, confirm:
- The camera is powered on
- The camera appears online in the Clutch dashboard
- The live stream is visible — find each camera's stream in the Camera tab of the dashboard
- The internet connection is stable
This helps avoid mounting the camera first and then needing to take it down later to troubleshoot power or internet.
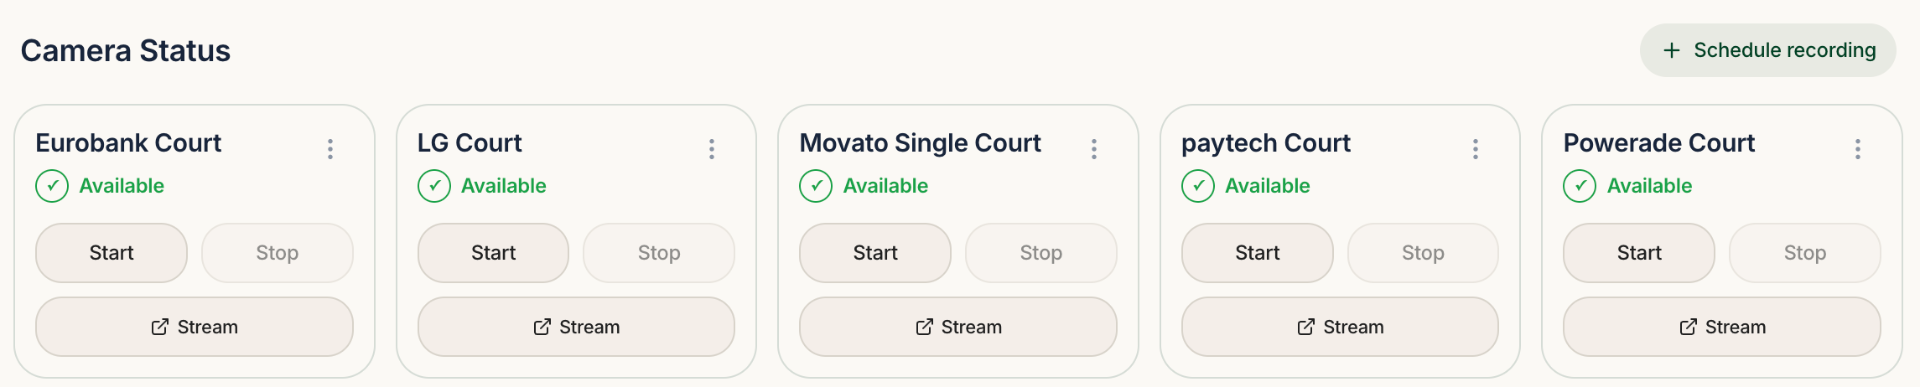
The live stream may have a short delay, but the camera should show as active before you continue.
Mounting, angle & calibration
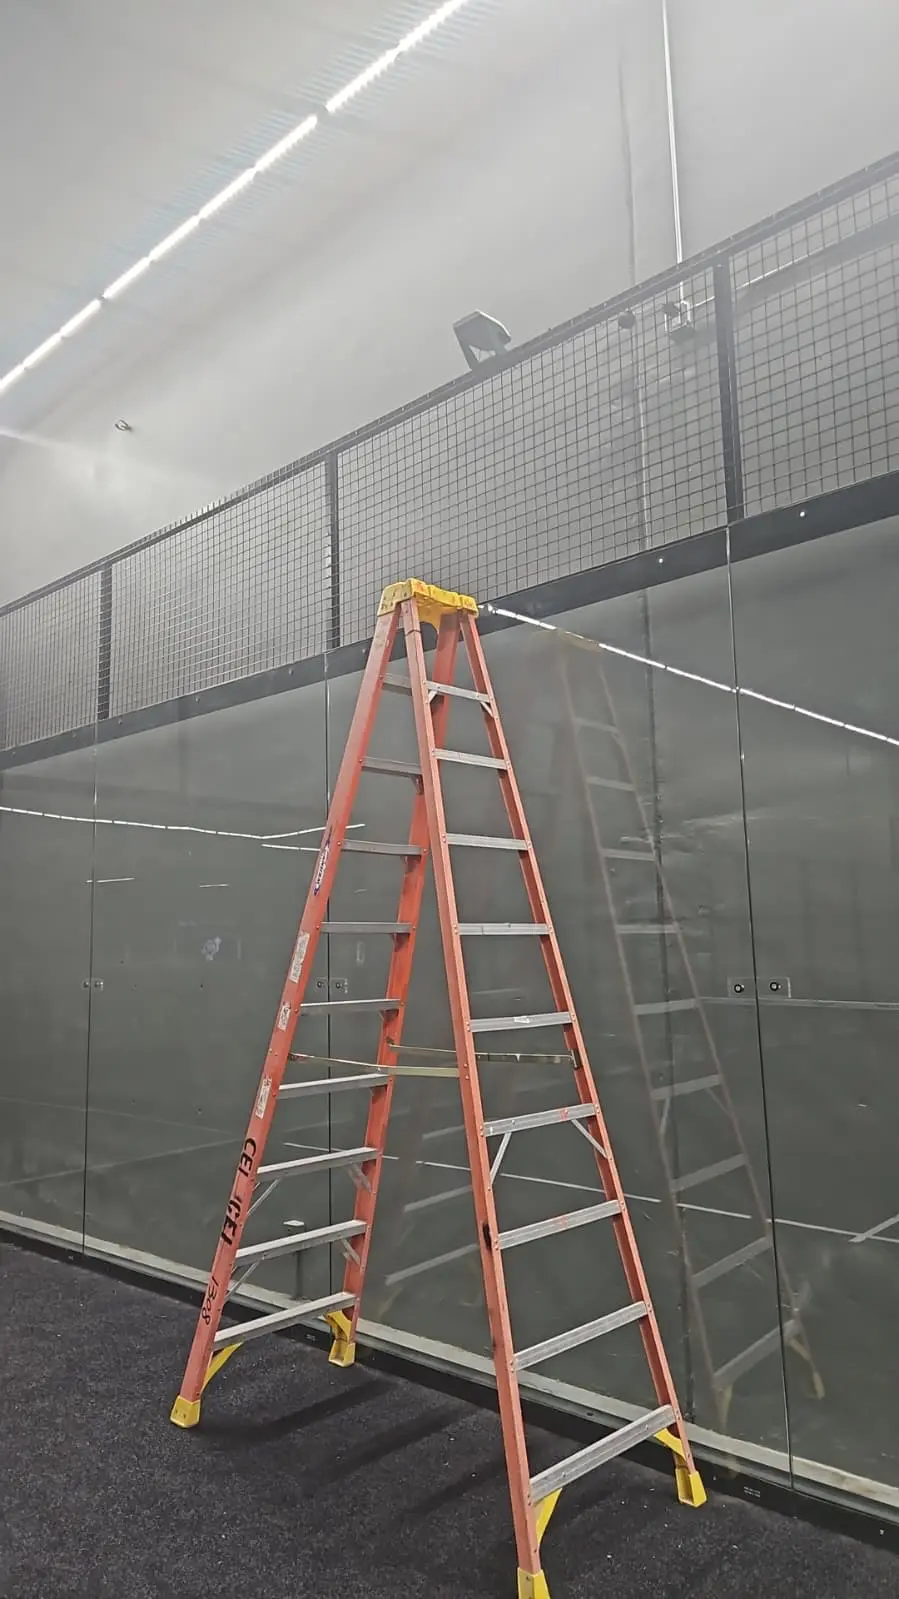
Get the perfect angle
Climb the ladder with your Clutch Cam, zip ties, and phone. The easiest way to set the angle is to open the live stream on your phone while someone helps position the camera.
Getting the angle right is the most important part of the setup.
For the best angle:
- 1Mount the camera at the top of the back glass, center of the baseline fenceAll Clutch Cams are mounted near the top of the back glass, on the center of the baseline fence.
- 2Point the camera straight down the courtMake sure that the service line is completely horizontal and that the camera isn't pointing either to the left or right. Make sure that the small front hooks on the base of the camera are flush against the inside of the fence.
- 3Secure the camera tightlyThe base of the camera should be completely flush against the top of the fence. Secure it tightly with 4 heavy duty zip ties, 2 on each side of the base.
Angle examples
Example 1: Good angle ✅ The service line is horizontal, and the court is centered in the frame.
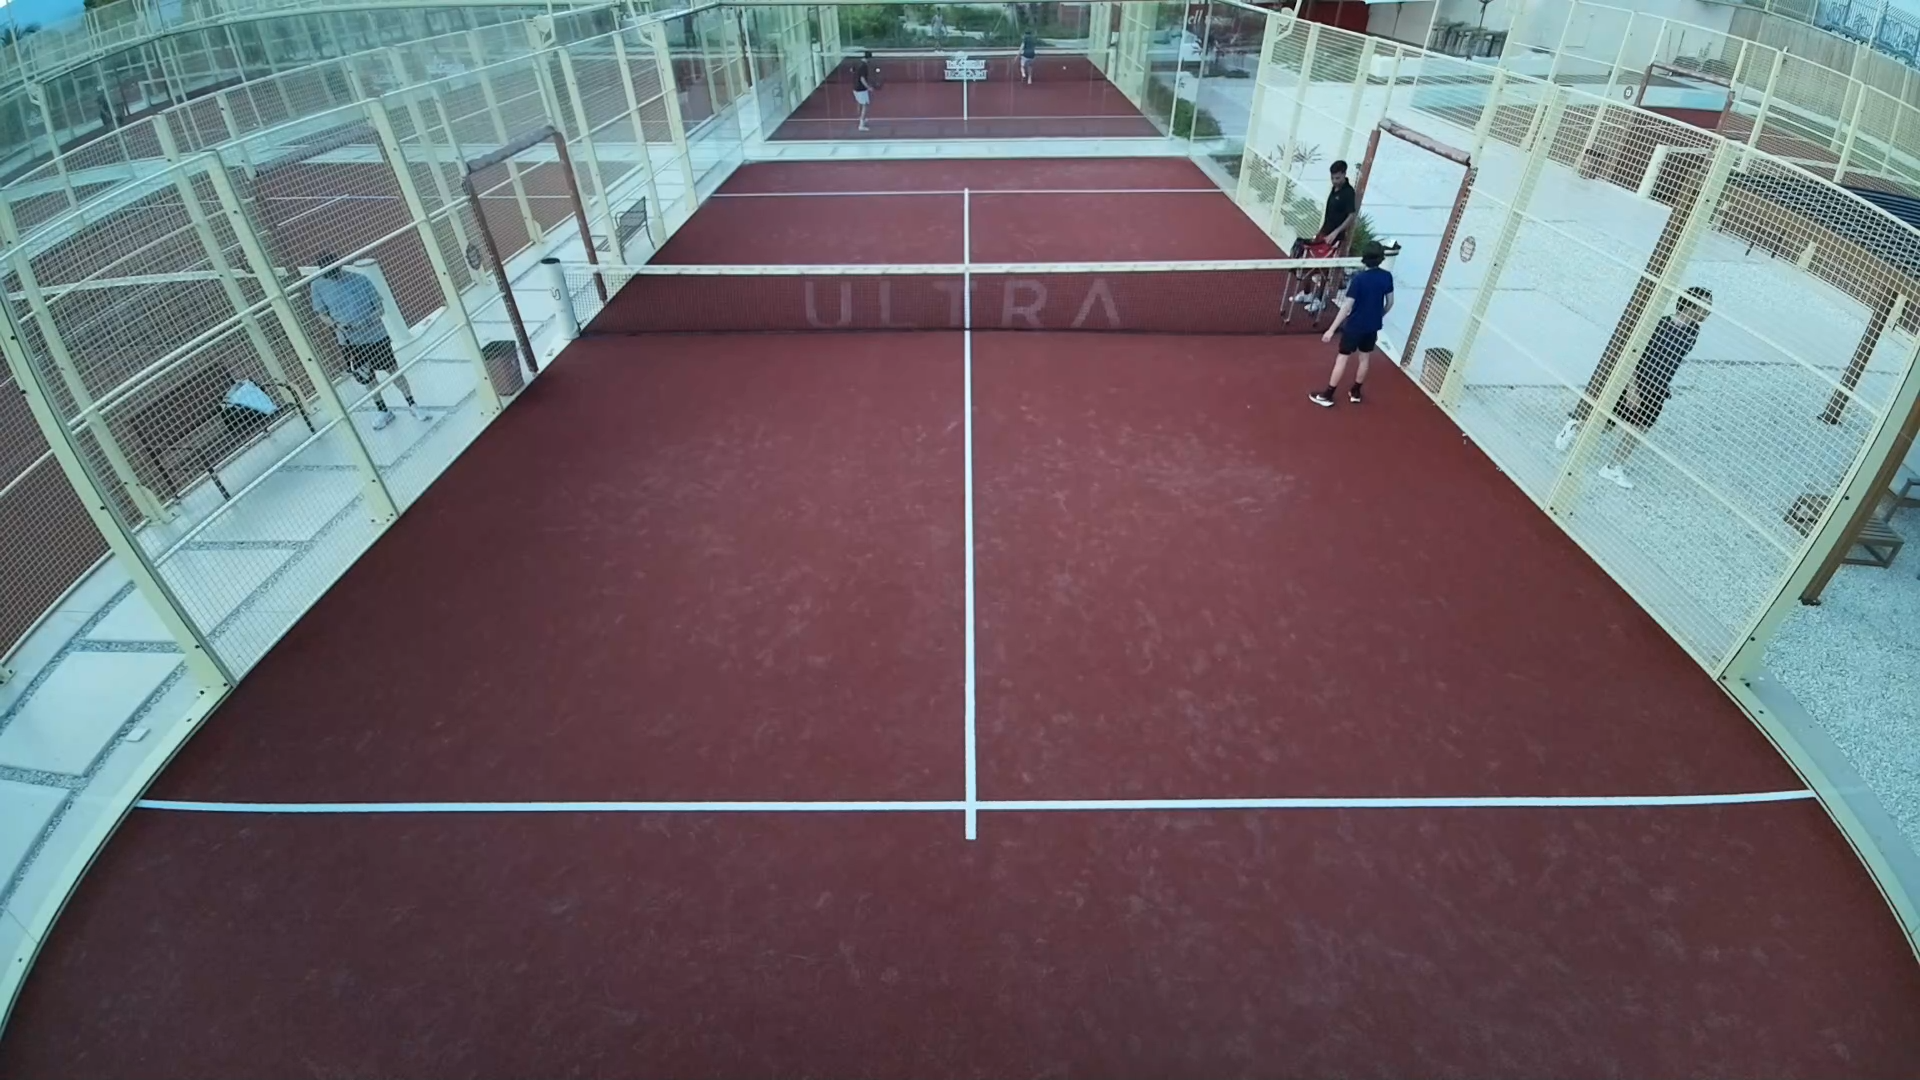
Example 2: Good angle ✅ The court lines are straight, and the full court is visible.
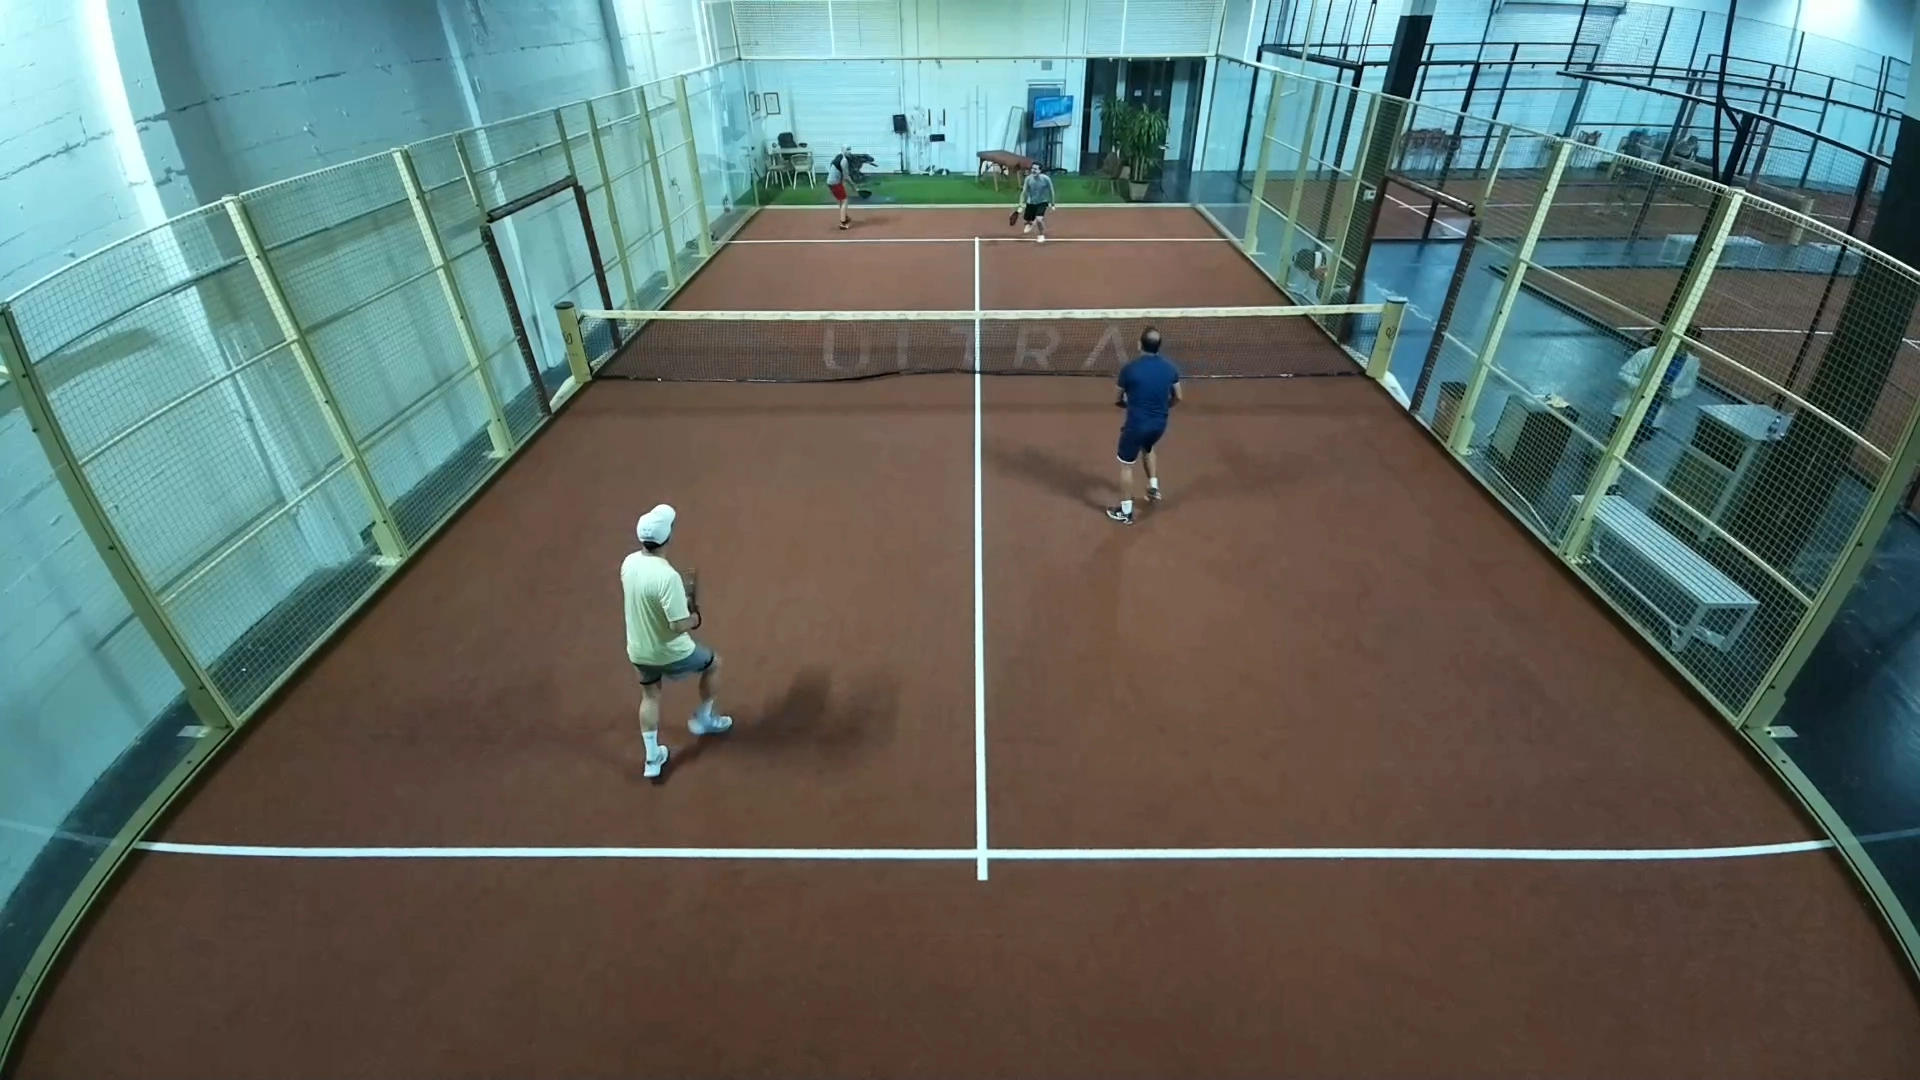
Final calibration
Once the camera is mounted and the angle looks good, tighten the zip ties again to make sure the camera stays in place.
If you need help, contact the Clutch team and we'll help you get it dialed in.
Troubleshooting
If the camera does not appear online:
- Check that the PoE cable and power source are connected and properly plugged in, with the indicator light showing
- Confirm the internet connection is active
- Make sure the camera has been added to your Clutch dashboard
- Refresh the dashboard after a few minutes
If the angle looks wrong:
- Cut the zip ties
- Use the live stream on your phone as a guide
- Re-center the court lines
- Tighten the camera again once the frame looks correct
If anything is still unclear, contact the Clutch team and we'll help you get it live. Reach us at info@clutchapp.io.