
Please feel free to contact us at info@clutchapp.io if something is not clear or your device is not working as intended!
WiFi configuration
WiFi configuration can happen anywhere in the hall, and you should ensure this is done before you proceed to mount the camera up.
What You'll Need
- ClutchCam
- Power Adapter: To plug into an electrical outlet. Make sure you use a 25W power adapter.
- Wi-Fi Settings: Know your Wi-Fi network name (SSID) and password
- Laptop/Phone: A laptop is preferred for easier setup
- Powering Up: Connect your ClutchCam to a power source using the USB-C cable and the power adapter. Once connected, wait for the device to boot up.
- Wi-Fi Connection: On your laptop, look for a new Wi-Fi network named
clutchcam-YYYZZZ(YYYZZZ will be a unique combination of letters and numbers specific to your device). - Initial Setup: Connect to this network. Upon connection, a setup wizard should automatically appear to guide you through the process.
- Manual Navigation: If the wizard doesn't pop up automatically, open your web browser and go to https://wifi.config to access the setup page manually. You can also access it from the browser going to
clutchcam-YYYZZZ.local.
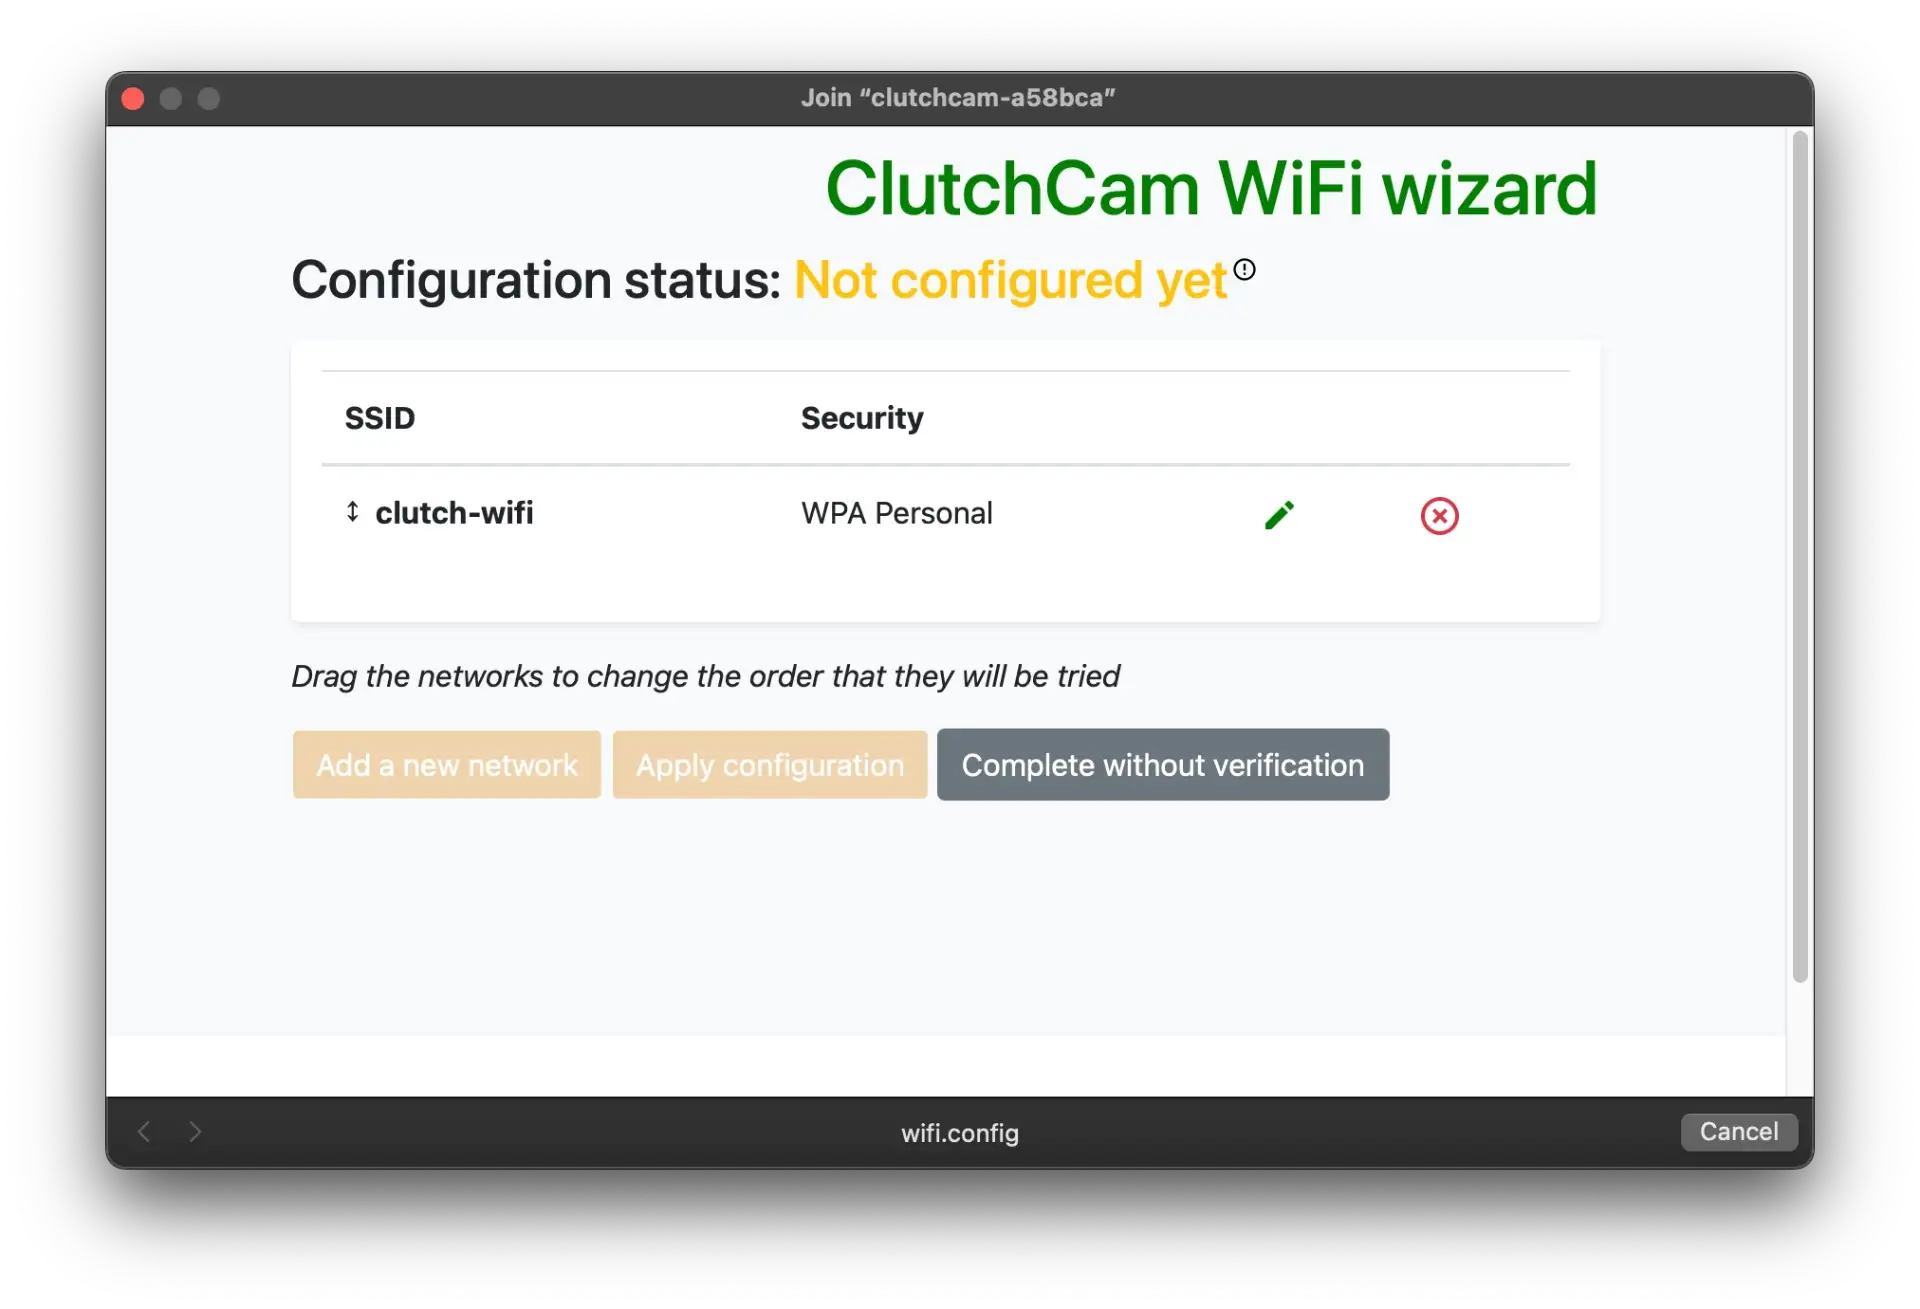
- Manual Navigation: If the wizard doesn't pop up automatically, open your web browser and go to https://wifi.config to access the setup page manually. You can also access it from the browser going to
- Connect to your Wi-Fi: Click on "Add a new network" (shown in the picture above). You'll see a list of available Wi-Fi networks. Find and select your home Wi-Fi network, then enter your Wi-Fi password.
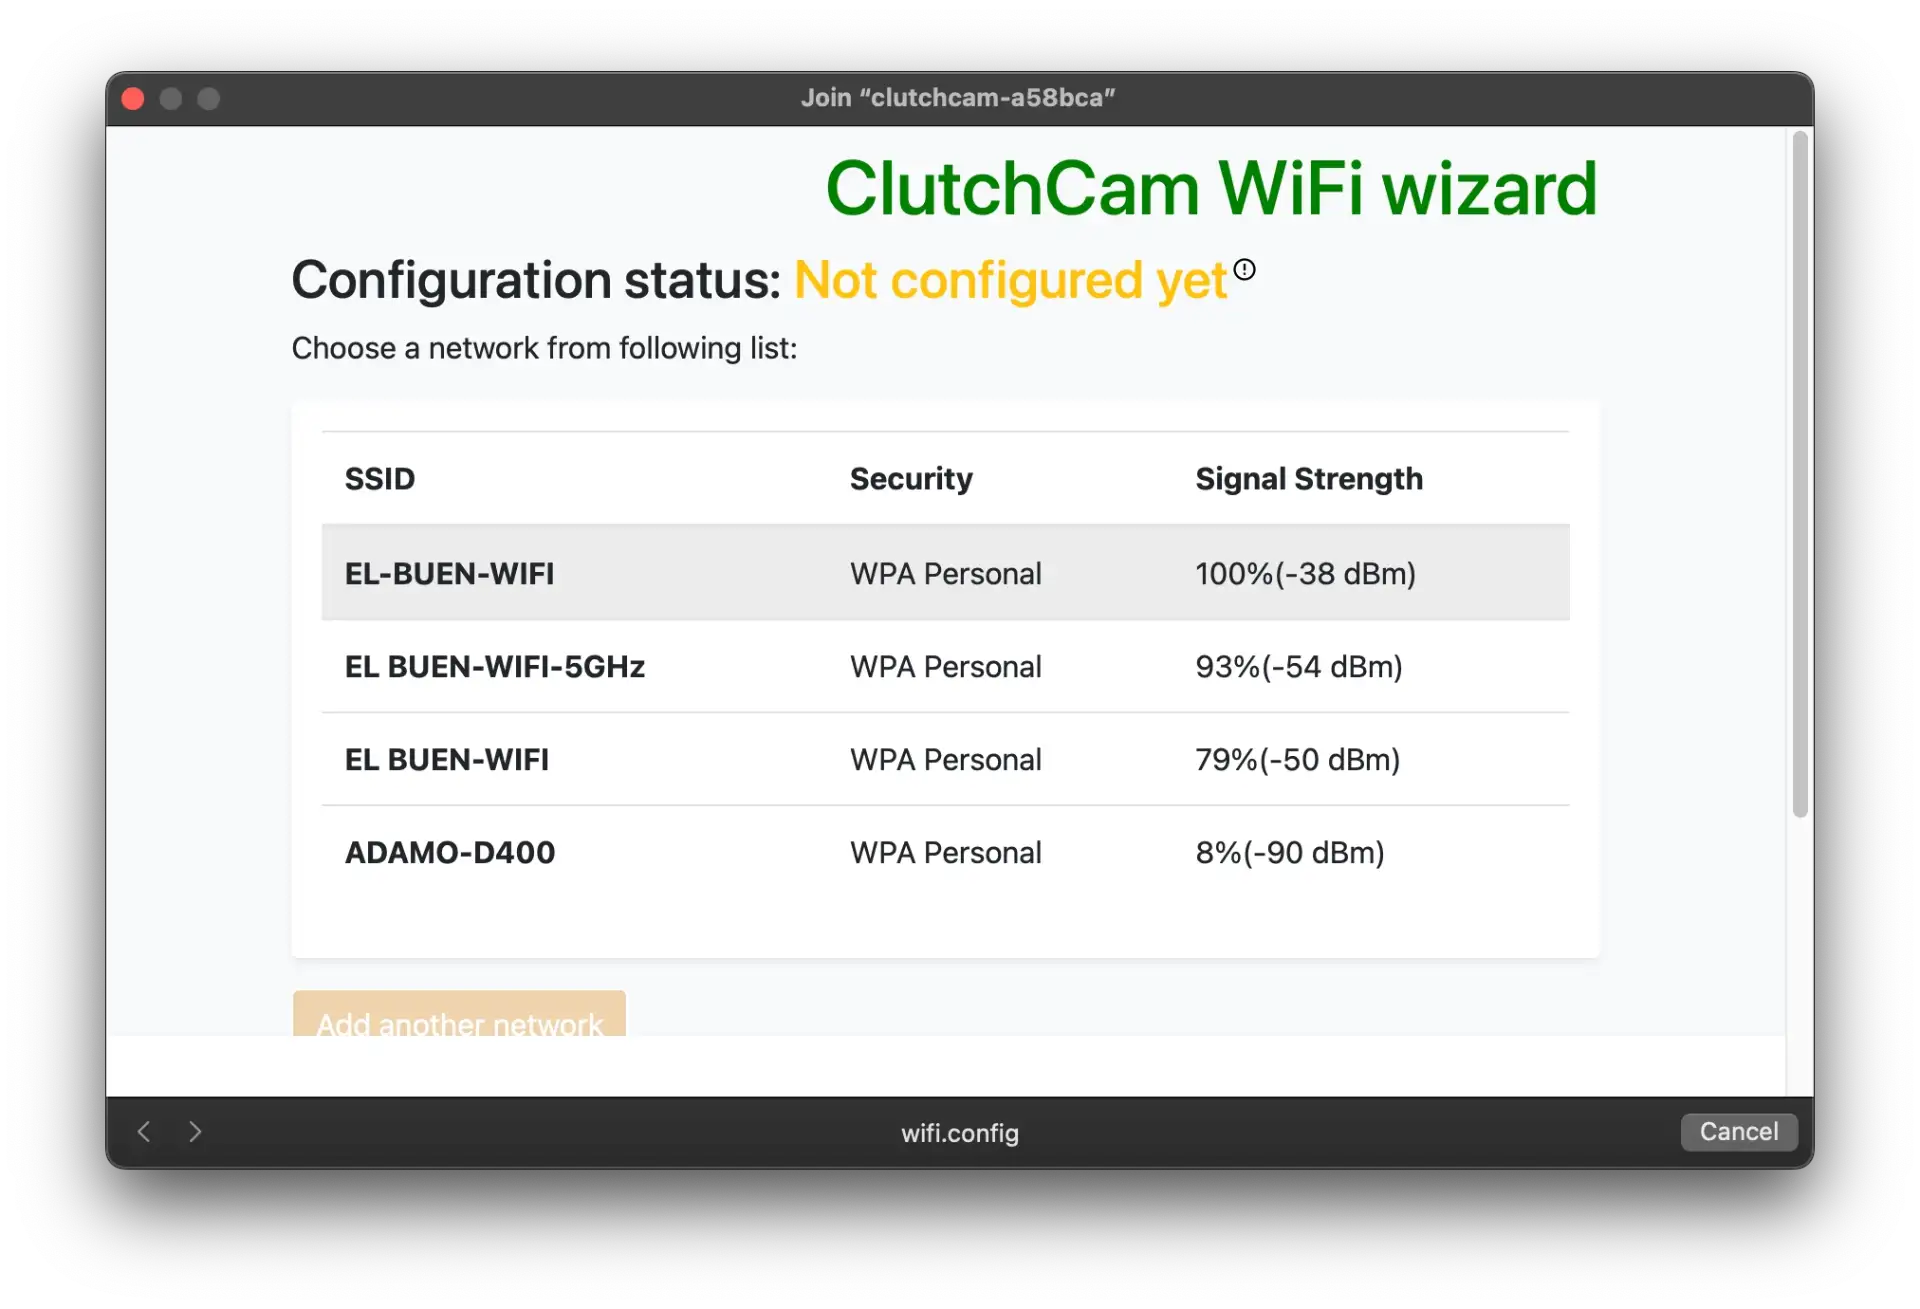
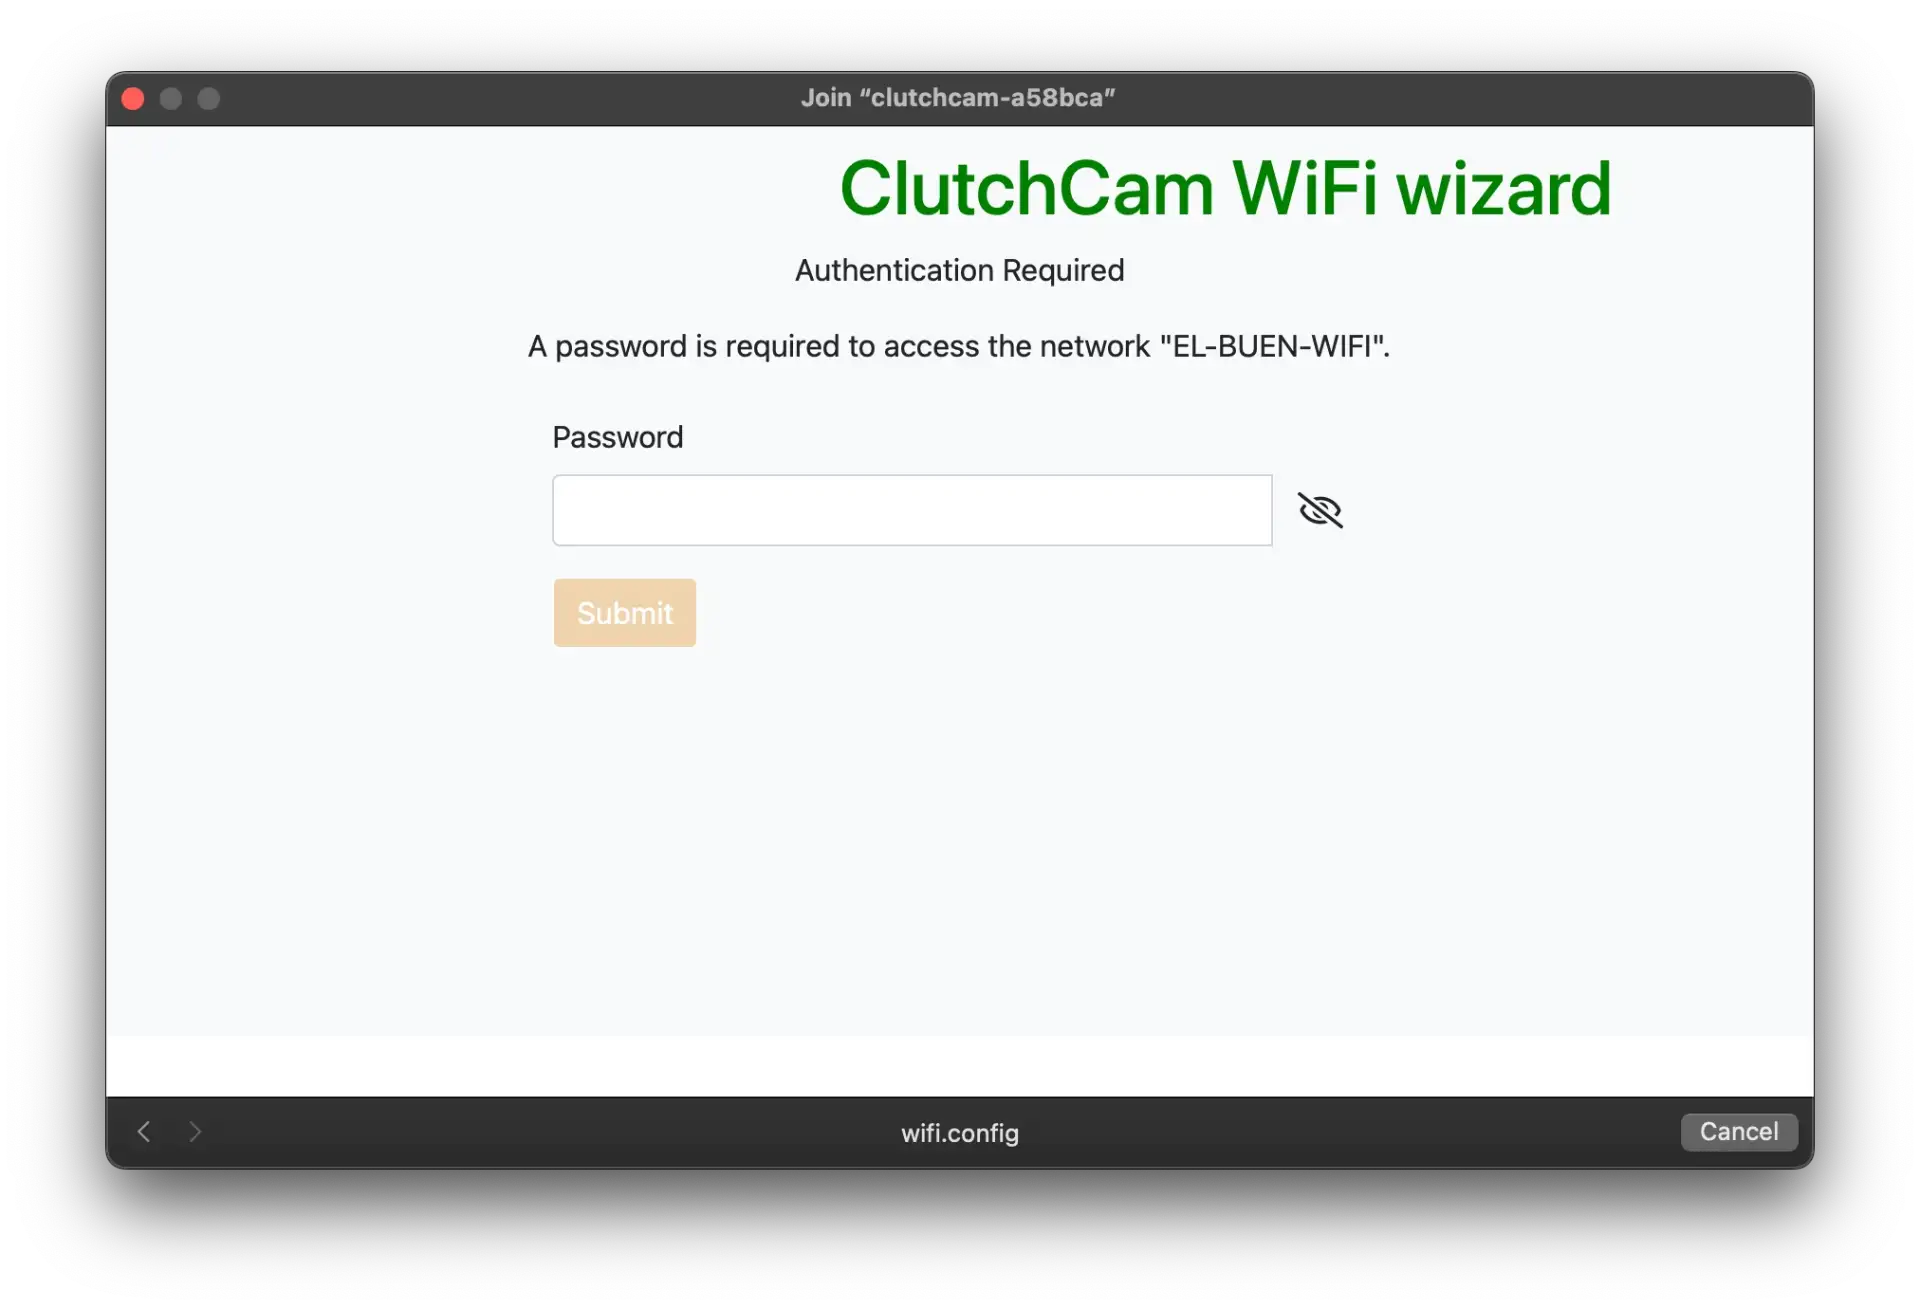
- Leave the
clutch-wifinetwork in place (you can sort it as the last priority), this network might come in useful for debugging possible networking issues.(optional) Add more WiFi networks repeating the previous steps if there are multiple networks your ClutchCam could use.
- Apply Configuration: Click on "Apply Configuration". This process might take 15-30 seconds. After this, reconnect to the
clutchcam-YYYZZZnetwork if your device doesn't do so automatically.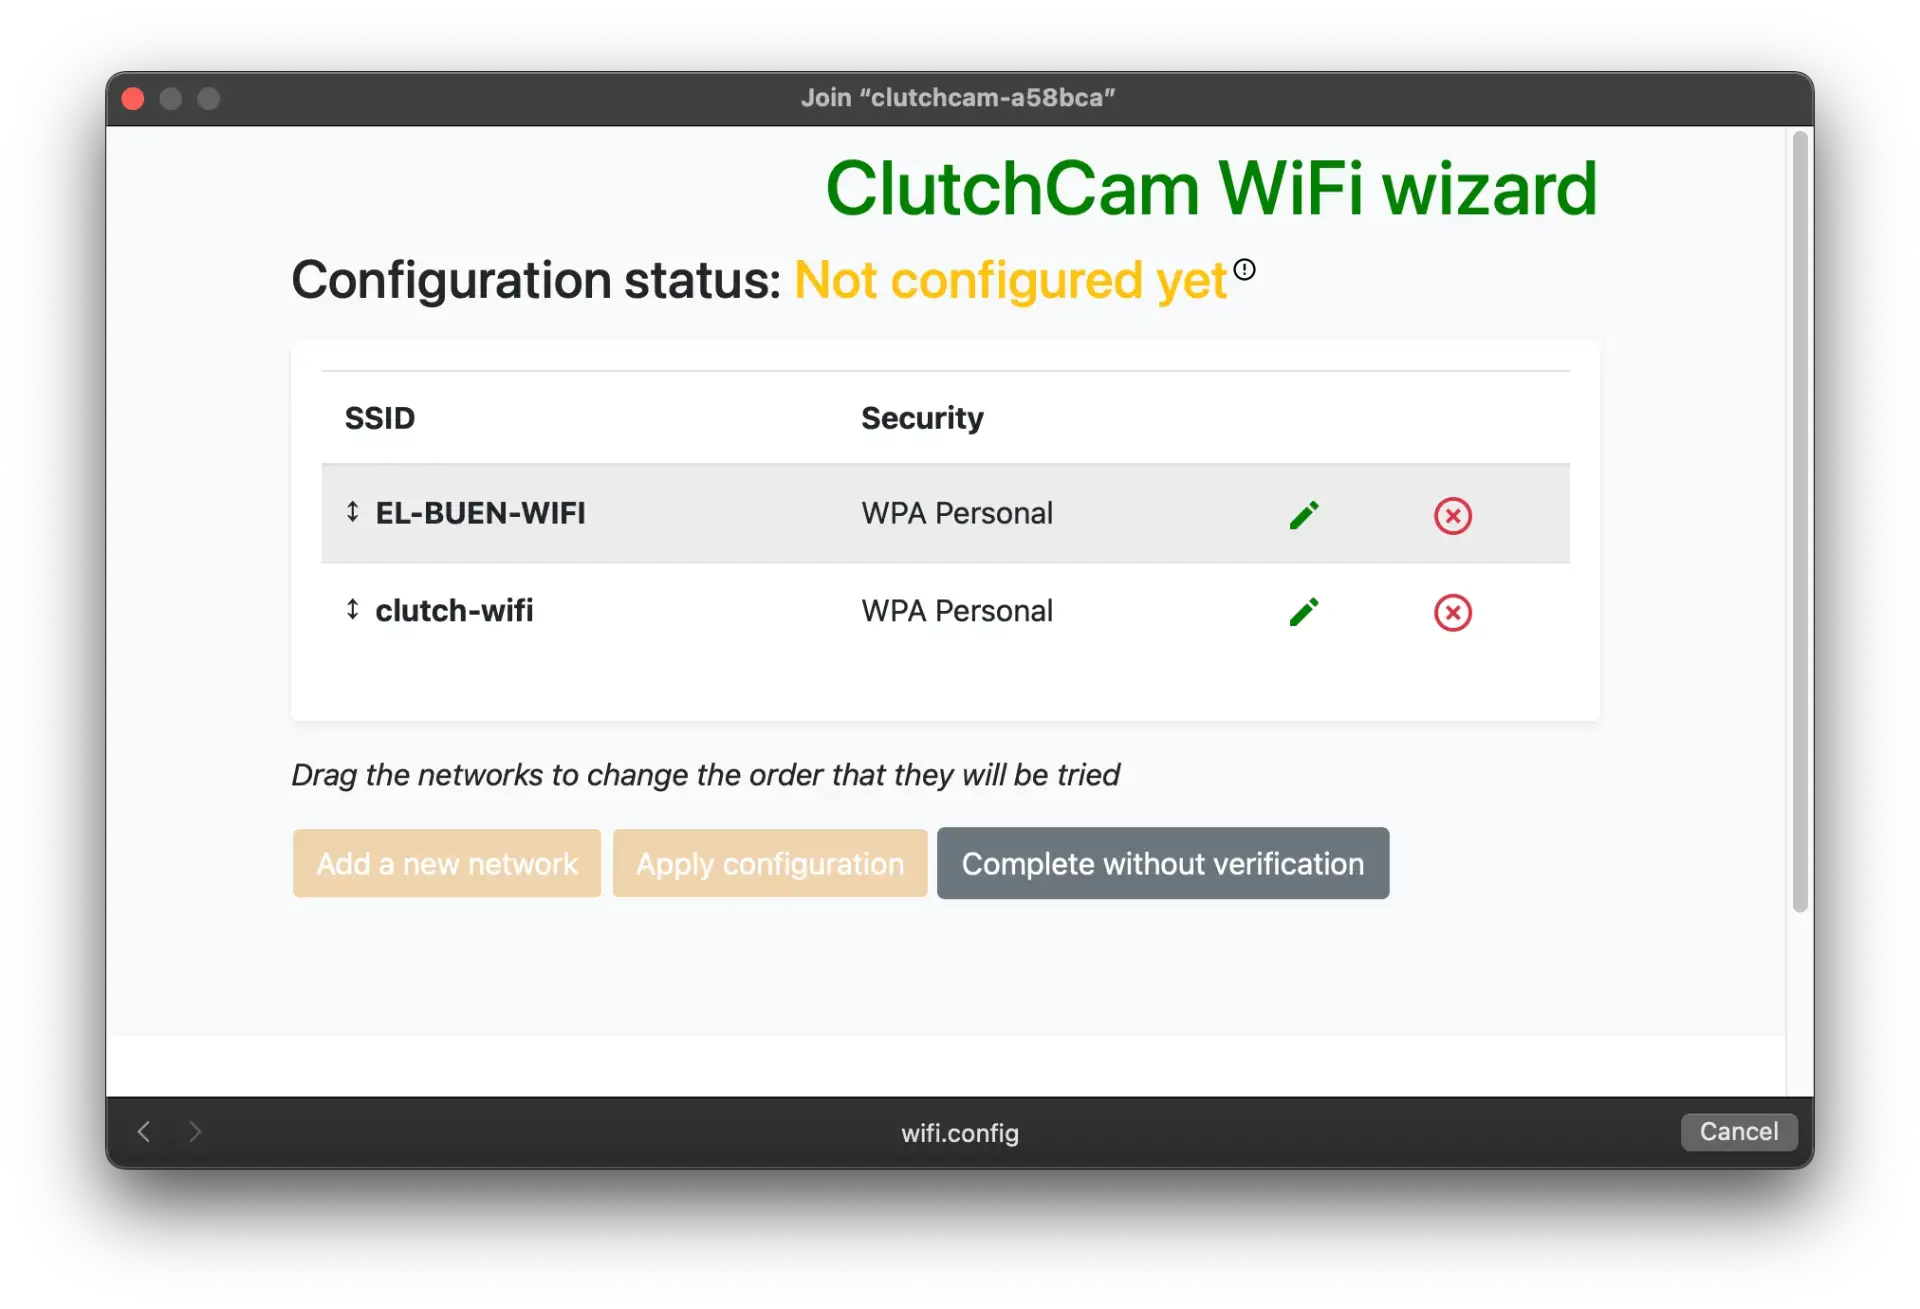
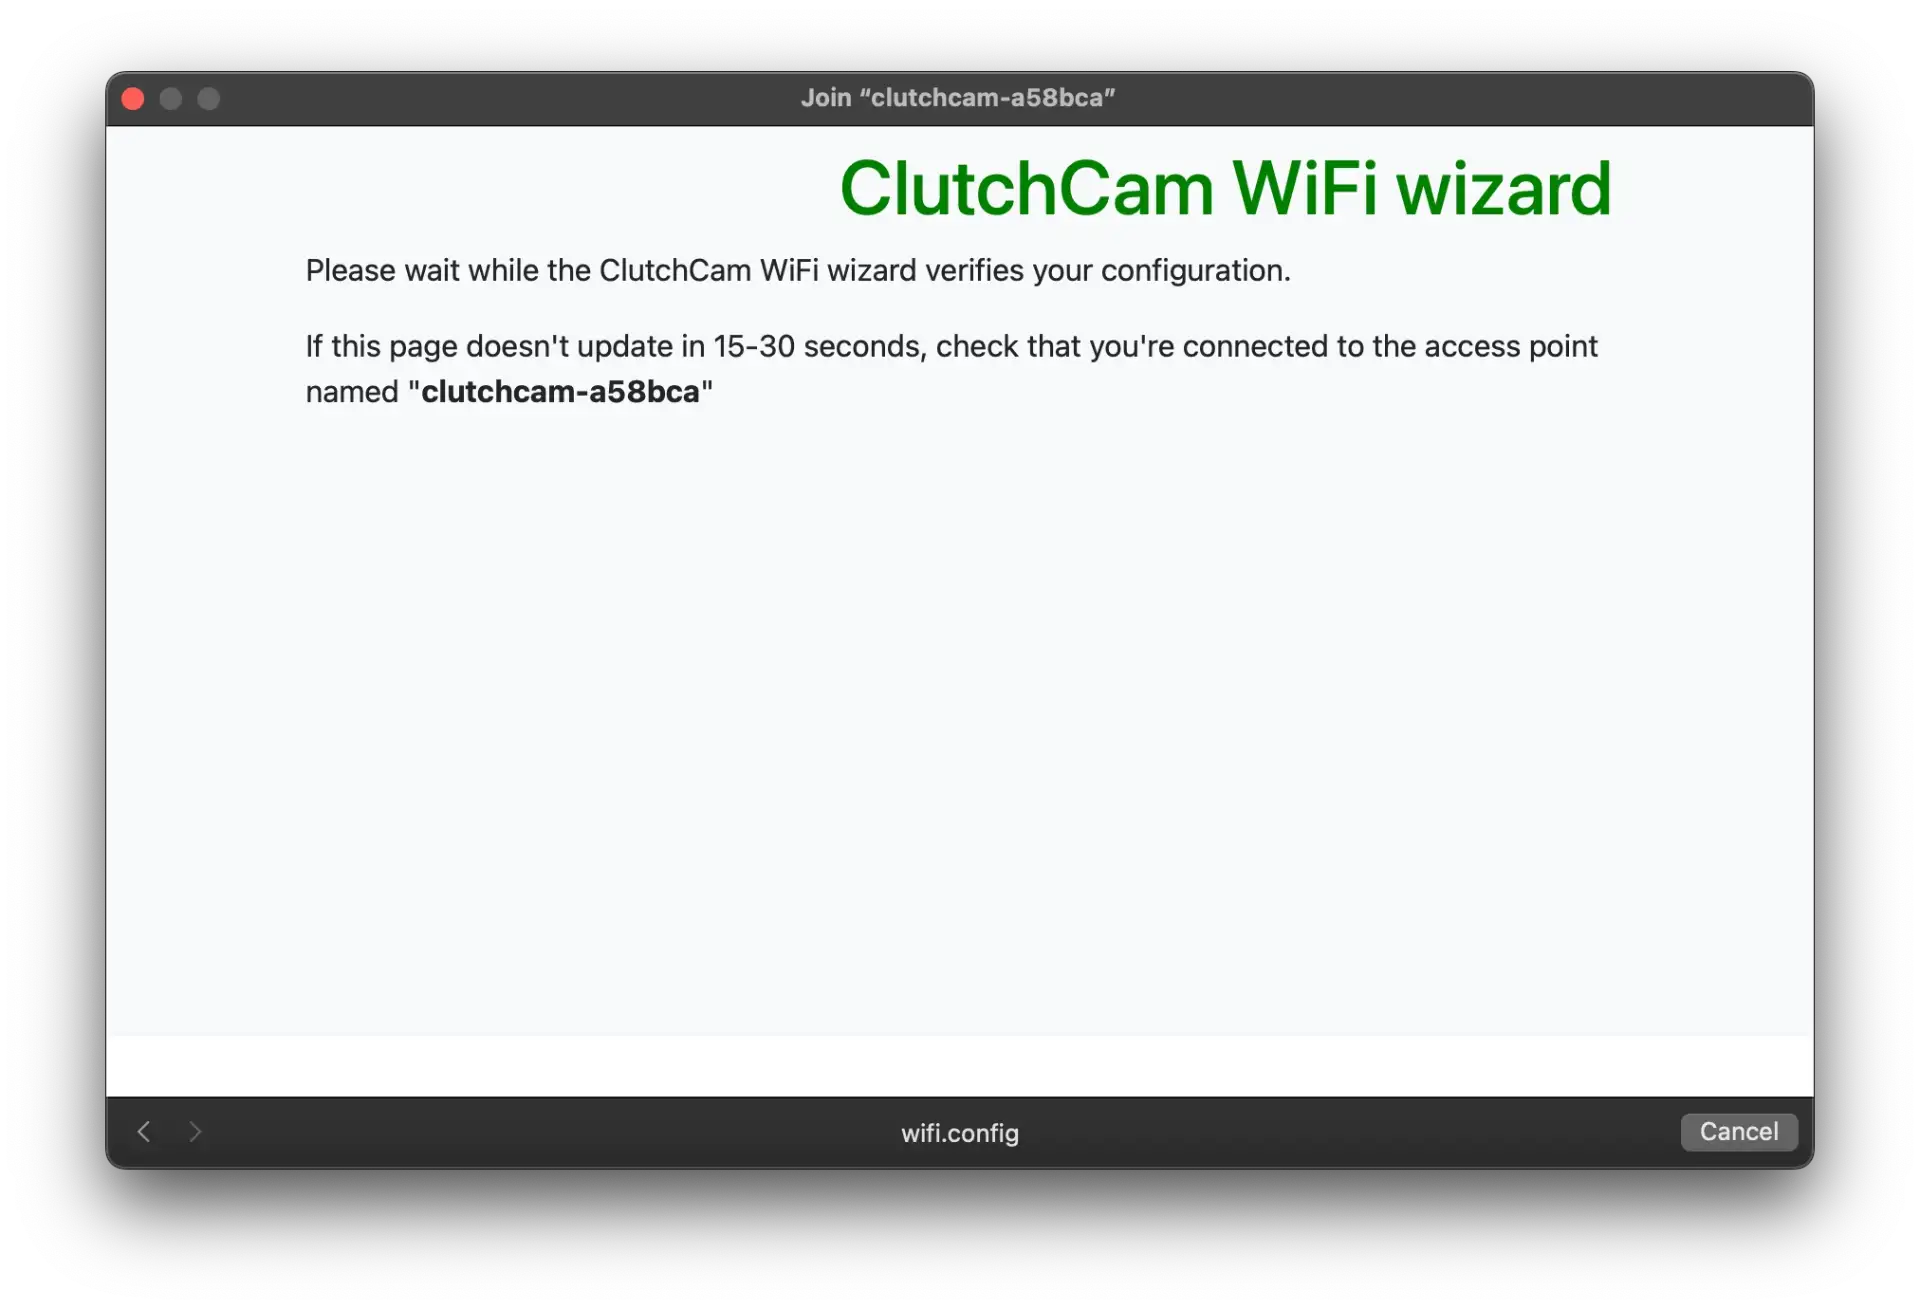
- Confirmation of Status: The setup wizard should reappear (or revisit https://wifi.config if it doesn't). Now, it should display "Status: Working".If it doesn't say "Working", press on the green pencil next to your wifi and ensure the password is the correct one and repeat step 6 until it says working. If this doesn't work, please contact info@clutchapp.io
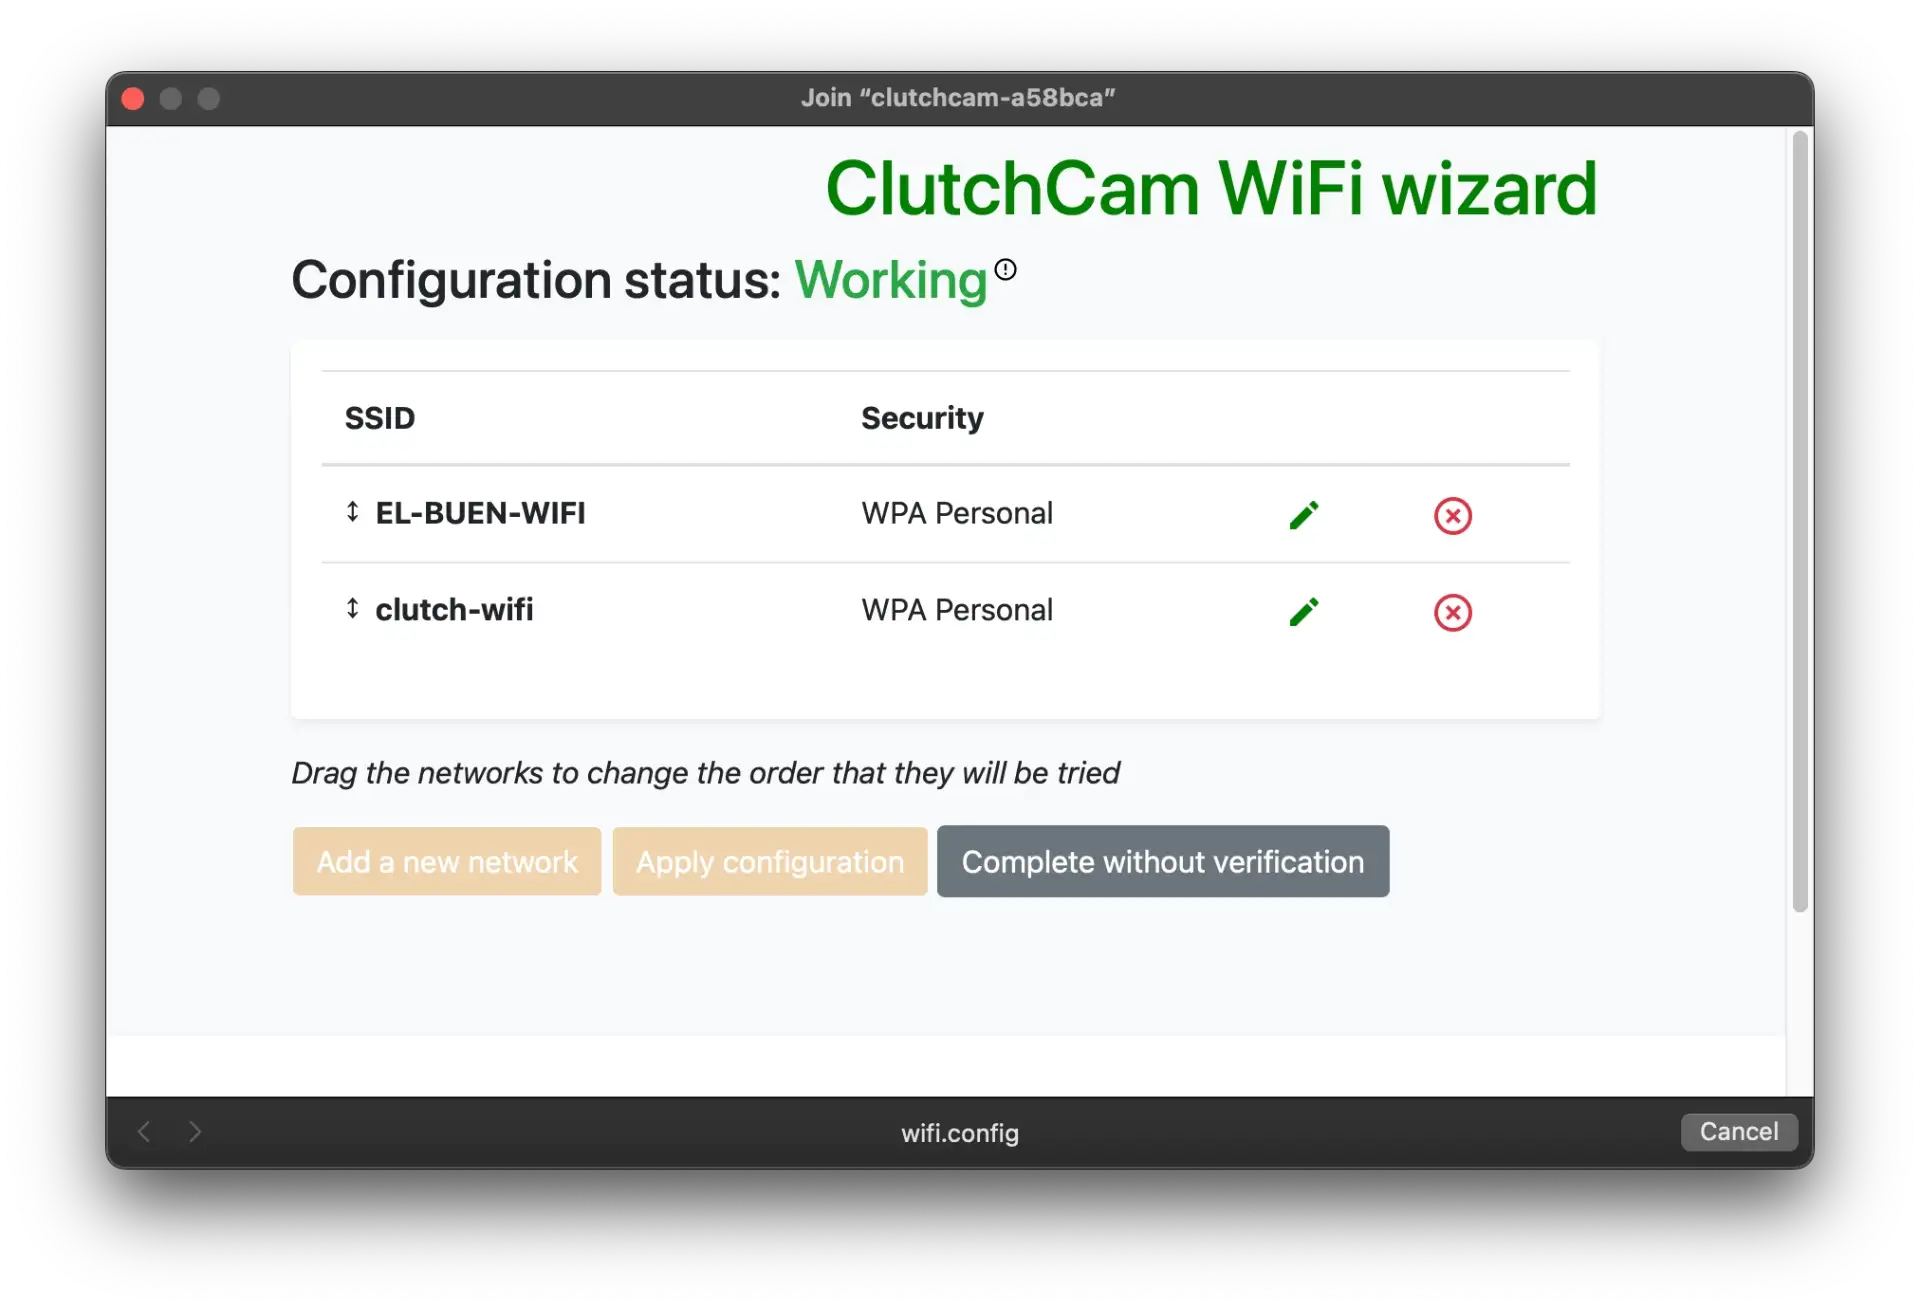
- Finalize Setup: Click "Apply Configuration" again. Your ClutchCam will restart, and the
clutchcam-YYYZZZWi-Fi network will disappear as it connects to your home Wi-Fi. - Successful Connection: After 30-40 seconds, the LED on your ClutchCam will turn white, indicating a successful connection to your Wi-Fi network. Your ClutchCam is now ready to use!
Camera set up
What You'll Need
- Two people: Recommended
- ClutchCam
- USB-C Cable: For power connection, preferrably USD PD enabled.
- Power Adapter: To plug into an electrical outlet. Must provide at least 25W of power.
- A ladder
- Phone: With the clutch app installed: Apple store — Google Play Store
- ClutchCam QR code: Provided in the box
- Electric extension chord: Optional
For the physical mounting steps, see our Mounting your Clutch Cam guide.
Getting ready to play
We'll provide you with a unique poster for each camera that has a unique QR code that can be used to start a recording. You can print this poster and hang it next to your court's entrance to promote the camera.
The camera can also be started directly from the app via Bluetooth.
It's likely that you will want to name the camera something different than clutchcam-abc123, email us info@clutchapp.io telling us the name of the camera and the name you want the camera to have, something like "RacketClub - court 2".
Tell your players about it and send us all the feedback you have!
Enjoy your ClutchCam! If you have any questions or need further assistance, please consult our support team. We're here to ensure your experience is seamless and enjoyable.
Please feel free to contact us at info@clutchapp.io if something is not clear or your device is not working as intended!